Warpgate SSO integration
In the previous post on Warpgate, we saw how to configure two-factor authentication for SSH access to servers on private network. Here, instead, we are going to analyze the possibility of integrating Single Sign-On authentication into the system. One of the most interesting aspects of Warpgate is the possibility of integrating Single Sign-On authentication with enterprise providers such as Microsoft Entra ID (Azure AD). Thanks to support for standard protocols such as OpenID Connect (OIDC) and SAML 2.0, Warpgate can completely delegate the authentication process to the corporate identity management system, allowing users to access using the same Microsoft credentials already adopted for other corporate services.
On one hand, this approach simplifies the user experience by eliminating the need to manage separate local accounts; on the other hand, it allows all security policies defined in Azure to be automatically applied, such as Multi-Factor Authentication, Conditional Access, compliant device control, and geographic restrictions. In practice, Warpgate becomes the unified access point to technical infrastructures, while Azure maintains its role as the central authority for identity and security.
Configuring Warpgate as an app on Microsoft Entra ID
The first thing to do is to register the Warpgate instance on the chosen provider, in my case Microsoft Entra ID, in order to obtain the Client ID, the Client Secret, and the Tenant. On the Microsoft Entra ID portal, register a new application and enter, as a Web Redirect URI, the Warpgate return URL https://<warpgate-external-host>/_warpgate/api/sso/return. At the end of this phase, take note of the Application ID, which, as we will see later, represents the Client ID for Warpgate, and also take note of the Directory ID, the Tenant for Warpgate.
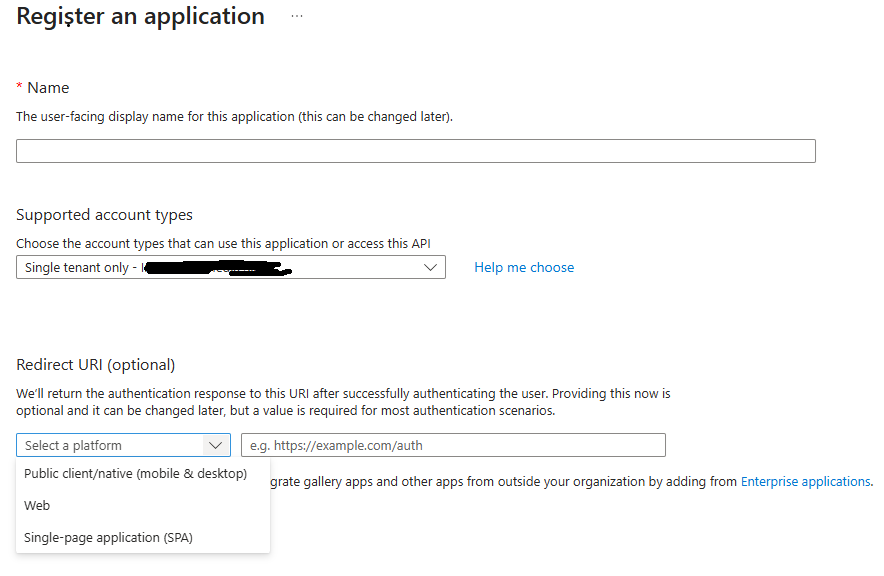
After registering the application, proceed and create the Client Secret.
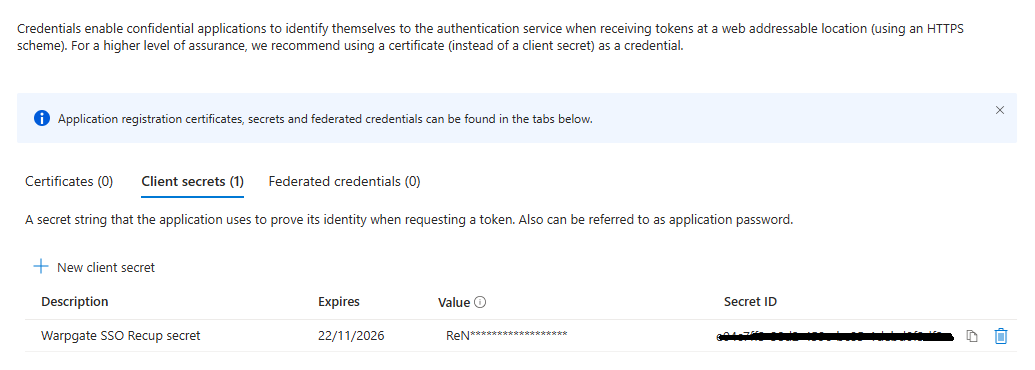
At this point, we have everything needed to move on to the Warpgate configuration.
SSO Configuration on Warpgate
In the Warpgate configuration file, we proceed by entering the information required for SSO integration with Azure, in particular:
- type: the provider type, in my case azure
- client_id: the Application ID obtained from Entra ID
- client_secret: the Client Secret received from Entra ID
- tenant: the Directory ID configured on Entra ID
- return_url_prefix: _: required on Azure/Entra ID to replace the ‘@’ character in the Redirect URI (@warpgate), which is not supported by Azure
- external_host: FQDN or public IP address of Warpgate
	external_host: <host public IP>
	sso_providers:
	- name: azure
      return_url_prefix: _
      provider:
        type: azure
        client_id: <Azure Client ID>
        client_secret: <Azure Client Secret>
        tenant: <Azure Tenant ID>
Let’s restart Warpgate, and we’re ready to configure SSO authentication for users. From the administration console, go to Config, select Users, choose the user, then click the Add SSO button. Enter the corporate email address and select the provider that was just configured.
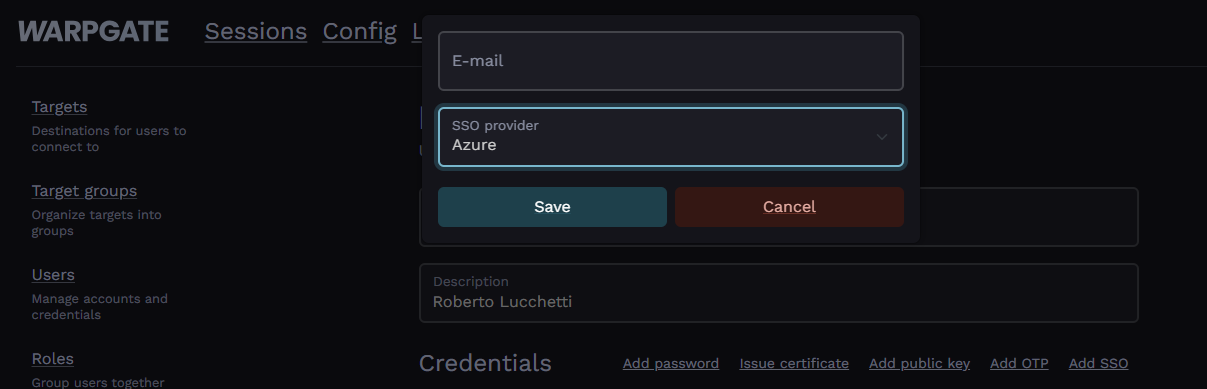
Warpgate links users to their SSO accounts based on their email address, so the user’s email address in Warpgate must match the one verified in Azure, since Warpgate requires the email address to be marked as verified by the SSO provider before allowing authentication.
Once SSO has been added you can configure it for Web HTTP authentication, while for SSH connections enable out-of-band web authentication. In this case, Warpgate will send a login link to the SSH client, requiring the user to authenticate through a browser using the same policies configured for the HTTP protocol.

Testing SSO Access
We are now ready to see SSO authentication in action for SSH connections through Warpgate.
Warpgate uses an out-of-band web authentication mechanism, so when an SSH session is initiated, the client will receive a login link that must be opened to confirm authentication with the SSO provider.

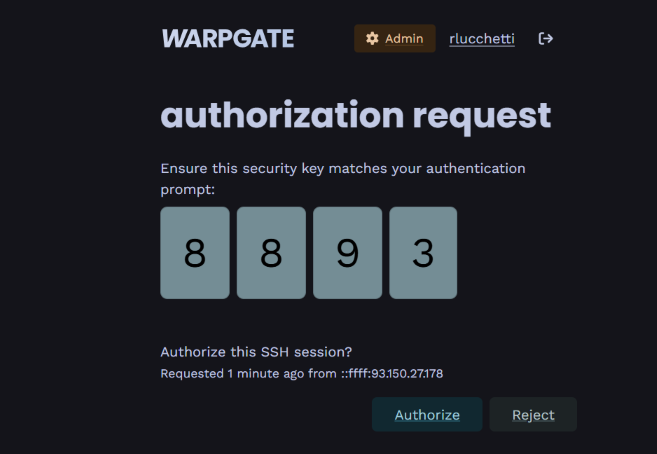
Click Authorize and the SSH session will be fully operational.